Nine microscale tips to improve your chemistry practical work
20 November 2017
A few weeks ago I spent a fascinating day with Bob Worley at CLEAPSS, and for my first blog post Bob has kindly shared 9 microscale practicals he’s developed from the CLEAPSS arsenal.
What is microscale chemistry?
Microscale chemistry involves working with small quantities of substances and using microscale techniques can improve the speed, safety and cost of chemistry practicals and can reduce the cognitive load for pupils.
It is an unfortunate fact that risks, logistics, expense and time can often prohibit practical work in science and sometimes little time remains to discuss the theory during the lesson.
Let’s get you started on the tips to help overcome some of the challenges in your science classes.
Tip 1 - Comparing indicator colours
The colours of pH indicator solutions make for attractive microscale practical. This method saves on the washing up time for technicians and also on the cost of solutions.
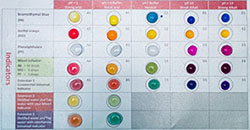
This simple method uses a laminated sheet where students mix solutions and indicator solution in small droplets on the laminated sheet. This decreases the volumes of solutions needed saving cost, the colour changes are clear, and a wipe with a paper towel is all that’s needed to clean up – brilliant!
Tip 2 - Precipitation reactions
This second tip is a real-time saver and also uses a laminated sheet.
Students add two soluble solids to either side of a small ‘puddle’ of water. As they dissolve, diffuse, and meet in the middle, a precipitate forms.
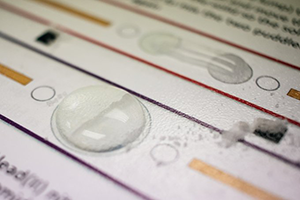
The formation of the precipitate is clear; students can get a closer view using a magnifying glass. This method gets students thinking about what’s going on during the reactions at the atomic level. Additionally, it lends itself to discussion of diffusion.
Tip 3 - Ammonia chemistry in a petri dish
This microscale practical also links to diffusion and is much quicker than carrying out all the tests individually
Here several solutions are placed around the edge of the petri dish (with control spots of solution added outside). Indicator paper is also present. Ammonia solution is then placed in the well in the centre of the petri dish.

As the ammonia diffuses, the colour of the indicator paper changes. The ammonia also reacts with the solutions, creating precipitates, complexes, and colour changes. There’s a lot of chemistry to discuss in this single petri dish.
Tip 4 - Sub-30 minute copper sulfate crystal
Make copper sulfate crystals inside 30 minutes. Teaching about separation methods is a common activity and this clever procedure is far less time-consuming so students won’t have to wait until the following lesson to see their crystals too.
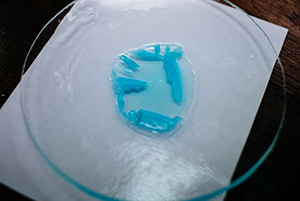
This technique carries out the reaction inside a small plastic syringe placed in a water bath. Placing filter paper in the end of the syringe makes filtration straightforward. Students then leave the solution over a hot water bath for a period of time to allow crystals to form. Quick and easy, and it leaves plenty of time for discussion of the processes students are using.
Tip 5 - A miniature Hoffman voltameter
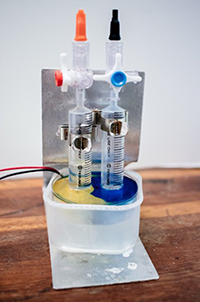
This microscale Hoffman voltameter apparatus illustrates the electrolysis of water. It requires some assembly, but it's much cheaper than the traditional Hoffman voltameters which are expensive and fragile.
The hydrogen and oxygen produced from this micro apparatus can be collected using plastic syringes and tested.
Tip 6 - Microscale titrations
Class titrations at GCSE are often prohibited by a lack of equipment or a concern that pupils will break it. The microscale titration uses a plastic dropping pipette in place of a burette.
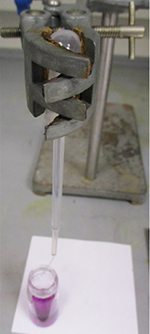
A clamp is used to gently squeeze the pipette and control the release of a solution. The mass of the solution before and after addition from the pipette can then be used in calculations.
Tip 7 - Magnesium oxide in bottle caps
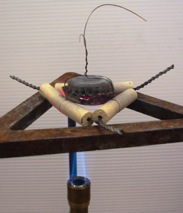
Carrying out the reaction inside metal bottle caps solves the issue of having to use crucibles which can crack with a risk of burning to students.
This method gives much better agreement with expected results to form magnesium oxide. Please note that for safety the plastic inserts in the metal bottle caps must be removed by heating in a fume cupboard beforehand.
Tip 8 - Microelectrolysis
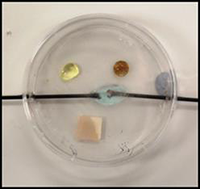
Using a customised petri dish to carry out electrolysis at a microscale level gets around several problems such as the need for large volumes of solutions, difficulty of observations and the production of toxic gases.
The method can be coupled with a digital microscope to examine the formation of the products in greater detail.
Tip 9 - Microscale cracking
This final microscale method in the series uses a glass Pasteur pipette as the reaction vessel and only requires 0.5cm3 of paraffin. Problems with water suck back and cracking glass are avoided.
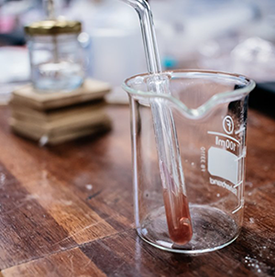
It’s also much quicker to carry out than the traditional method, a real advantage with ample time to discuss the results.
Where to find more
CLEAPSS developed all the practicals featured here, and plenty of other microscale ideas can be found on their site.
Here at OCR we’ve already incorporated some microscale work into our suggested A Level and GCSE chemistry PAGs. These practical activities are available through Interchange. Remember that these activities can be used as alternatives to other PAGs wherever appropriate.
If you have any questions email our subject advisors at science@ocr.org.uk. If you’re considering teaching OCR Science sign up for updates or follow us on Twitter @OCR_Science
About the author
 Andy Brunning - Subject Advisor - Chemistry
Andy joined OCR in September 2017 as the Subject Advisor for A Level Chemistry. Before joining OCR he worked as a chemistry teacher in Bournemouth and Cambridge, and is particularly interested in context-based teaching approaches. In his spare time he enjoys photography, graphic design, and playing the guitar.